Debadge Car
Debadge car or not to debadge car...that is the question.
"Sometimes you just gotta step back and ask yourself if debadging your car is really a challenge you are fully prepared to take on yourself."
I get it! The struggle is real...
If you accept your limitations after reading this page and want to reach out to Darren and have him perform this for you, go to this page and read how to contact him directly
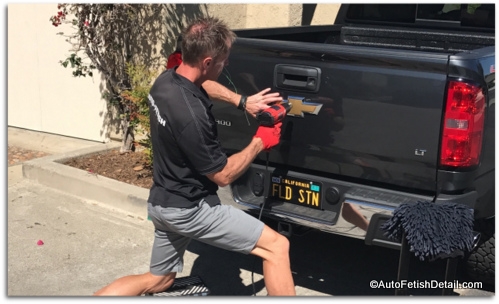
You are likely here for one of two reasons:
- You are looking to see exactly how you debadge a car.
- You are looking for a professional with loads of experience to debadge your car for you.
The intent of this page is to provide something for both. And perhaps you might find that where you started when you first came to "Debadge Car" has now gotten you to the other side of the coin.
Either way I will inform and educate you as to what is involved every step of the way so you will at the very minimum, be a well informed car owner.
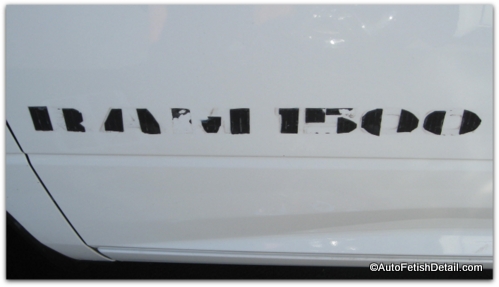 Once the original car badges are removed, it will expose the double sided tape that is used to secure most car badges and emblems to the car or truck.
Debadge Car:
What you can expect on this page
- I will be showing you all the steps to debadging your car as we go.
- I will be using examples from the countless car and trucks I have debadge over the years.
- I will also be providing some of the actual tools and products I use professionally that you can purchase yourself if you decide to take this project on yourself.
Debadge Car:
4 steps to success
1) Removal of Car Badge or Emblem:
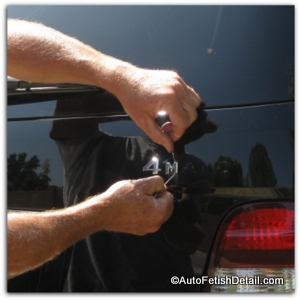 Here I am debadging the Mercedes ML using dental floss to remove the chrome plastic emblems.
This is the first and probably the easiest step in the process. There are numerous ways to go about this and much of your choice will depend on how old your car is. (The rule of this game is this: the older your car is, the more difficult each and every one of these steps will be to perform)
Most professionals like myself prefer to heat up the individual emblems with a heat gun and use either dental floss or fishing line to slide and slice under each emblem to separate it from the double sided tape that is used to fasten these car badges to the vehicle.
This is the first layer of concern for most people trying to debadge car themselves. If you are using a professional heat gun like I do, the potential to over-heat the paint can blister and/or discolor the paint as you are heating up the emblems for removal.
2) Removal of double sided tape:
Every car badge or emblem that does not have fastening pins going through the body panel will be attached with double sided tape. Every car manufacturer uses their own unique double sided tape. As a professional I come across anything and everything from thin to very thick double sided tape.
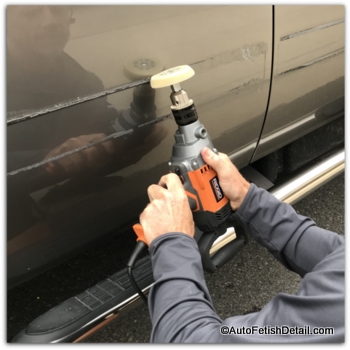
This part of the process is where most guys will really run into problems. If you do not have an eraser tool like I recommend at removing car emblems, then likely you will be left trying to scrape and peel this difficult double sided tape off with your hand/fingers.
Many guys will reach for some form of adhesive remover at this point (Goof-off or GooGone) and quickly realize they have now made a difficult and messy situation even more difficult and messier.
These adhesive removers were not meant to dissolve double sided tape. The 3M eraser tool is my go-to tool that quickly shreds this gooey material off your car quickly and safely. At this point a guy will become very frustrated with this newly created mess —and will reach for things like a plastic or metal scraper that were never meant to come in contact with car paint.
Guys will become so frustrated that they desperately reach for a tool like this and proceed to scrape the double side tape off that has become a gooey mess with the application of one of these traditional adhesive removers, but end up damaging their car paint and create a much worse problem.
The second problem starts as guys become very impatient if they do not have an eraser wheel and are trying to peel off the double sided tape with their hands or fingers only.
This gets very painful on your fingers quickly, but most guys will stop short of where they should, and then proceed to start using one of the traditional adhesive removers.
Any traditional adhesive remover is intended to remove very thin layers of adhesive —not any thick, double sided tape. Using adhesive removers on double sided tape only creates a fat, gooey mess that will frustrate the most patient among us.
3) Remove residual adhesive:
 Here is a perfect shot of both the double sided tape and the ghost shadow of the clear, residual adhesive.
There is always going to be a thin, mostly clear layer of adhesive that will need to be removed. Neither the 3M eraser wheel or your fingers will be able to remove this tacky, thin layer of adhesive. You will need some form of chemical adhesive remover to do this.
Removing the adhesive is yet another step in which frustration can quickly set in with using inferior adhesive removers that require lots of rubbing. Not only do these inferior adhesive removers require lots of rubbing, but typically cause a guy to proceed to rub harder and harder trying to force the adhesive remover to work quicker. All this excessive hard rubbing is almost always a sure way to dramatically abrade the paint.
On light colored cars this can be a non-issue, but on any dark/black colored car, the abraded area(s) will definitely present an unwanted problem.
4) Polish area
For true perfection on any colored car, polishing is always necessary.
Yes the paint can be polished by hand —but for truly professional results— polishing the paint with a machine polisher will be the only way to finish the paint to perfection once the debadging process is complete.
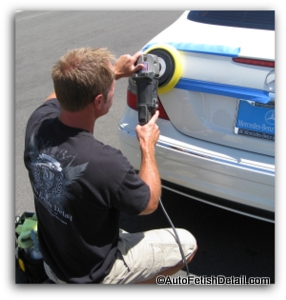 Here I am polishing the area in which I removed the car badges from this Mercedes. For true perfection, polishing is always a must for any car debadging job.
As stated above when removing the adhesive —the lighter the paint on your vehicle is, the easier every step of this process will be since light colored paint is so forgiving compared to darker colored car paints.
What also needs addressing is the fact that there will always be some type of "wear pattern" left in the paint regardless of how perfectly or cleanly you removed all layers of the car badge —plastic emblem, double sided tape, and adhesive.
True perfection will always require some type of polishing to refine the paint to original condition.
Debadge Car Summary
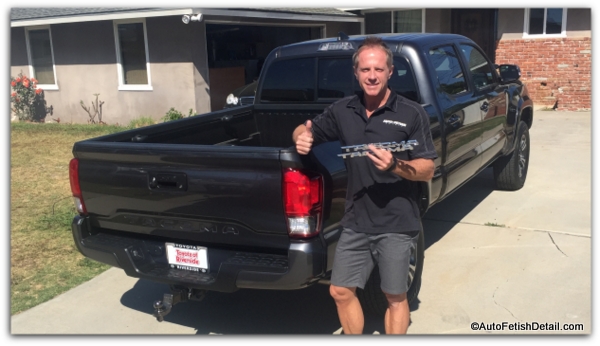
To wrap this all up, let me bullet point the key factors when it comes to debadging your car:
- You can attempt to debadge your car yourself, or hire professional like me.
- If you do it yourself, you need to seriously consider the unwanted consequences if something goes wrong —the thrill of victory is short, the agony of defeat lingers. (and the scratches you left last forever0
- The older and darker your car, the more difficult every step will be.
- If you are even remotely considering this on your new car, but still trying to decide, know that the sooner you get them off the better.
I hope I have helped you come to new understanding of the "debadge car" process as well as offered additional insight.
My goal is always to help people like yourself to become more informed car owners so you can also make better decisions.
Sincerely
Darren Priest
- Home
- Car Badges Emblems
- This Page
|
|

